Open Source Drum e-cymbal project
![]()
Files are available through this GitHub repository.

Discuss on this Discord Channel to share ideas and progress about these projects.
Open Source E-Cymbal V1
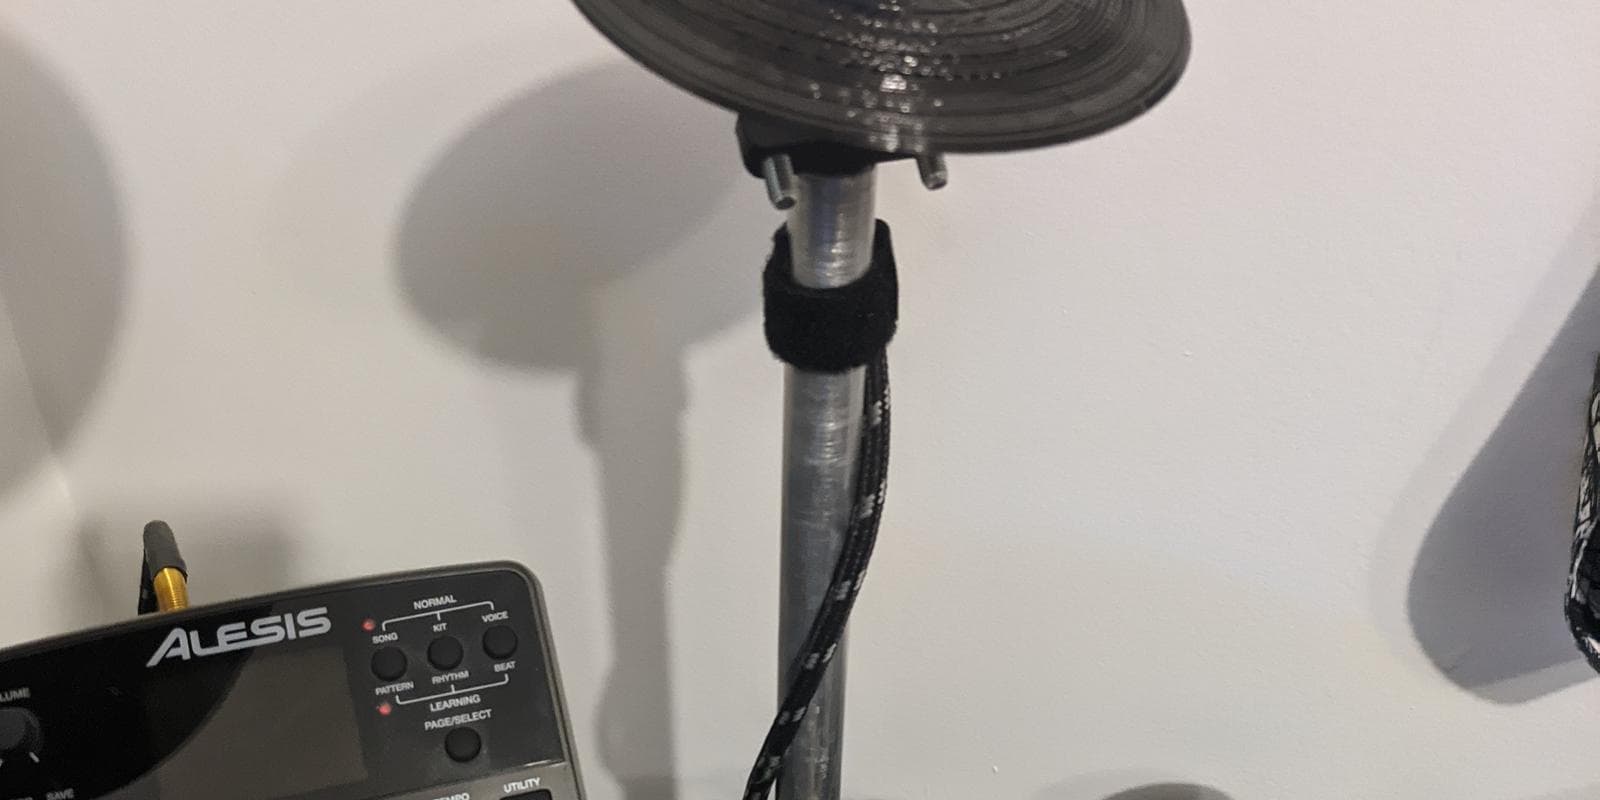
I recently got an electronic drum kit and I really love it. My Nitro Mesh Kit from Alesis has 2 extra inputs, which makes it perfect for a small project.
The extra kit for an extra tom and cymbals is quite cheap, around 140 CAD, but still I wanted to see how 3D printing could be used in this situation. I already had a 3D model for a 3D printed boom stand for acoustic drum kit, I simplified it a bit, so it's more adapted for e-drums.
BOM V1
| Item | Quantity | Name | Part-Number |
|---|---|---|---|
| 1 | 1 | Ball | 3D Printed |
| 2 | 1 | Ball Outer Clamp | 3D Printed |
| 3 | 2 | Felt | Cut foam or felt |
| 4 | 1 | Knob | 3D Printed |
| 5 | 1 | Tube Expander | 3D Printed |
| 6 | 1 | Clamp | 3D Printed |
| 7 | 1 | Sleeve | 3D Printed |
| 8 | 1 | Aluminum Tube 3/4" OD | Any local metal supplier |
| 9 | 1 | Cymbal | 3D Printed |
| 10 | 6 | Hex socket head cap screw M6x1.00 x 40 | McMaster 90128A268 |
| 11 | 1 | Prevailing torque hex flange nut M6x1.00 | McMaster 92461A300 |
| 12 | 1 | Piezo Element 25mm | DigiKey 7BB-27-4L0 |
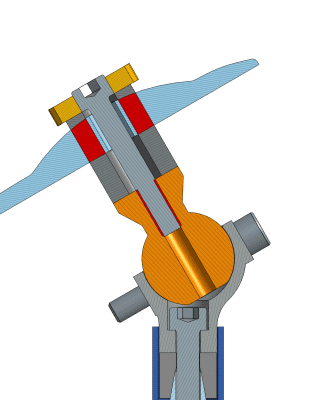
Concept details
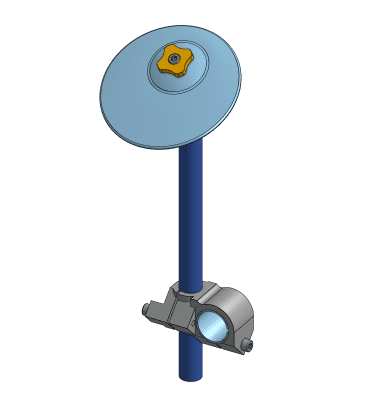
Ball adjustments
It's one of my favorite thing with cymbals stands, having a ball adjustment where the cymbal is. It gives you such freedom, and it makes it much simpler. As there is no challenge in printing this shape with 3D print, it seemed like a good solution.
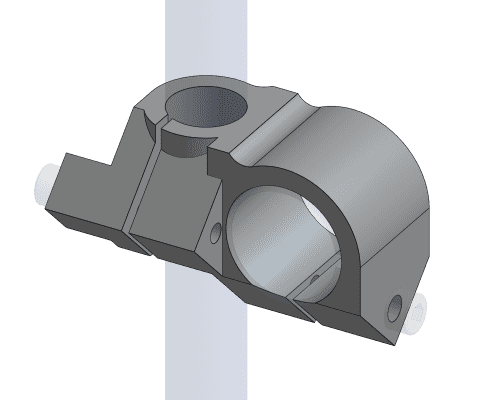
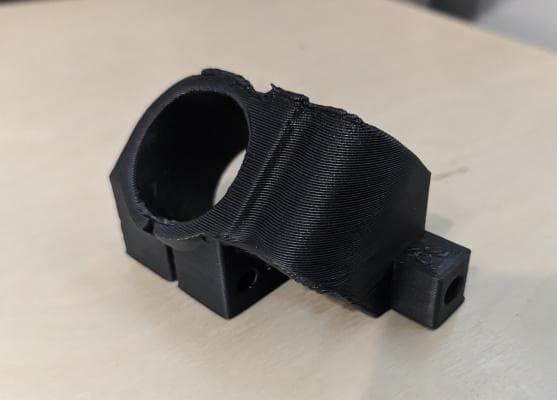
One piece clamp
Very similar to the original one, but adapted for 3D printing. The secret into doing right is to print it, so both tubes are at 45° from the printing bed. By doing so, there are no weaknesses (especially regarding the strength between layers) as seen from one tube clamp or the other.
One screw size
I always do my best to limit the amount of hardware required for a project. It's not always a success, as with greater complexity comes greater hardware requirements. With this whole project, I managed to use a single screw type: M6x40.
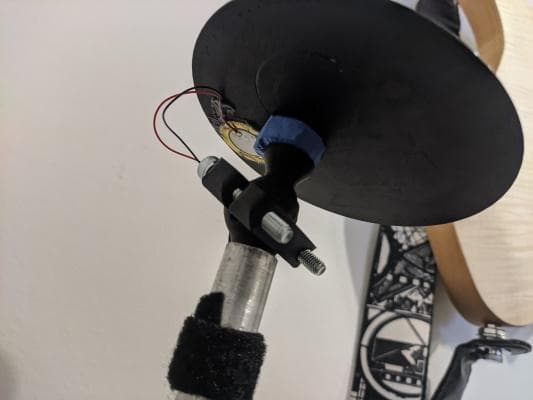
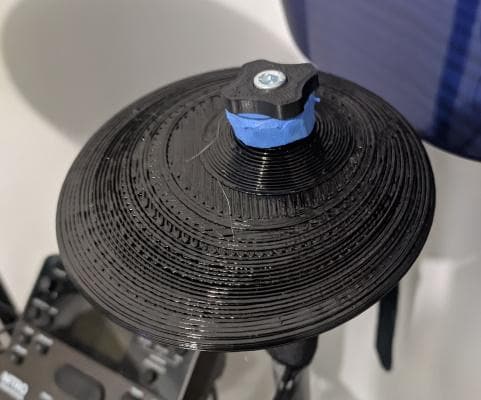
TPU Cymbal
The Cymbal is made from TPU, 85 shore A. You can see that there is a bit of under-extrusion on the top. I changed the stepper drivers on my 3D printer and didn't realize the hotend fans were disconnected during the process. After a while, the heat moved to the cold side, and it got harder and harder to extrude. Once I fixed the fan connector during the print, the flow came back to normal.
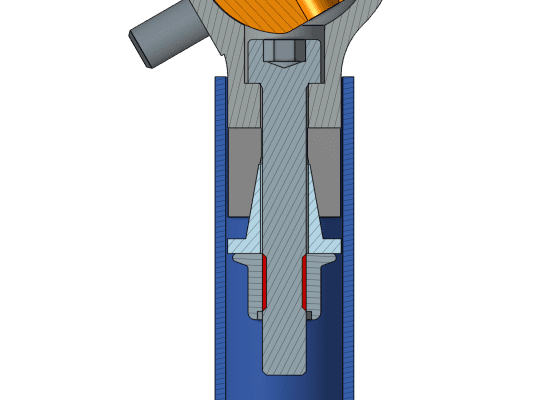
Screw strengtheners
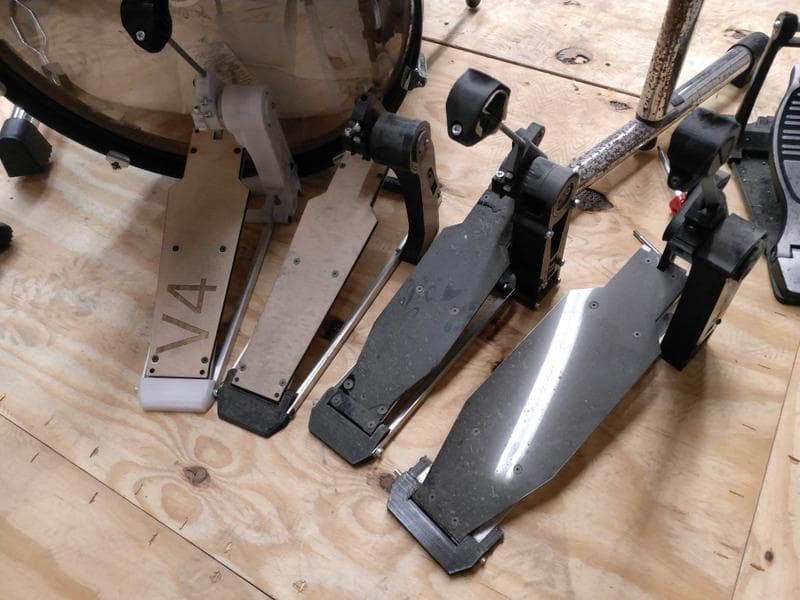
It might be hard to see, but the screw in the system are pretty long, and they are helping strengthen the weak points of the 3D printed parts. I've been using the same trick with the 3D printed pedal on the 3D printed shaft assembly from V1 to V4, before I switch to a shoulder screw shaft.
New features and fix for V2
Tube insert
The tube insert didn't work. I need to add a small feature to block rotation, otherwise I can't manage to tighten the screw as the taper part with the hex nut are rotating with it. The idea was to design a system that could be easy to repair if something is broken. By loosening the screw located inside the tube, one could easily disassemble the stand.
Cymbal rotation
I started simple, but I'll definitely need to use something to lock the cymbal rotation.
Bigger cymbal
Again, started small to make sure this idea could work. I'll definitely need to reduce the amount of plastic used when increasing the size. I'll need to make sure it still looks good, it's going to be a challenge!
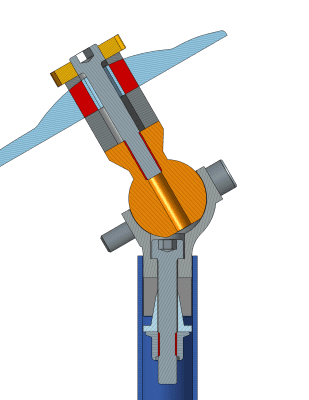
Ball screw are in wrong orientation
I didn't see that one when working on the 3D model. The ball socket is slightly tilted towards the player to allow more freedom. As of now, the screw are adjusted from the back, which is quite unpleasant.
Ball slipping
I purposely made the ball small since e-drums are usually much lighter. However, I found that the current ball size is slipping when the cymbal is struck too hard. I want to avoid requiring high screw tension, as the 3D printed parts could suffer from a prolonged high load. Next version will have a bigger ball, simply. I'm pretty sure I can manage to save some weight by removing a bit of extra material inside.
One piece clamp overhangs
I underestimated the overhangs from having the design done at 45°. I personally avoid using a fan when prints need to be strong, so an improvement would be to change some overhangs to a lower value than 45°.
Piezo is too sensitive
The 25-27mm piezo is generating too much voltage, even on a small hit. I believe a smaller piezo will help solve this issue.
Felt looks aweful
Well, I took what I had on hands, but I believe it wouldn't hurt getting standard felt washers, or anything equivalent.
Conclusion
Quite satisfying for such a simple and quick design. I haven't calculated the costs, but I believe it's quite low, as the amount of hardware and 3D printed parts is quite minimal. I'll probably design a V2 very soon and see where we get.