Open Source Drum Pedal project
![]()
Files are available through this GitHub repository.

Discuss on this Discord Channel to share ideas and progress about these projects.
Open Source Drum Pedal V7
Finally, the blog is not in sync with my developments! I've been trying to catch up as I started writing these post once I was working on the V4. I'll be able to add more details, pictures and documentation.
There are quite a few changes in this version, especially in terms of bearings and bushings. I've been using the same idea since the V1 about using 6 mm needle bearings as much as possible, and now I just started going the opposite way. I figured out that it was very hard to get a decent quality of needle bearing, thus all my previous designs had some kind of slack in the different linkages, and it made it feel of poor quality.
One of the improvements is inspired by the Axis Microtune Spring tensioner, where tightening a screw the top will increase the spring tension. If you recall before the V5 (compression spring), I was using a slider inside the vertical frame, similarly to the Darwin FTW.
BOM
| Item | Quantity | Name | Material | Manufacturer | Reference Part Number |
|---|---|---|---|---|---|
| 1 | 1 | Dowel Pin 6 x 80 | Steel Class 10.9 | McMaster | 91595A490 |
| 2 | 6 | 04.0 x 13 x 05.0 - F 624 ZZ Flanged Ball Bearing | Steel 52100 | F624ZZ | |
| 3 | 3 | Shoulder Screw | Steel Class 10.9 | McMaster | 92981A743 |
| 4 | 6 | M3 Thread Insert | - None - | McMaster | 94459A140 |
| 5 | 1 | DP - Board | - None - | 3D Printed | |
| 6 | 1 | DP - Heel Shaft Base | - None - | 3D Printed | |
| 7 | 1 | DP - Link Base | - None - | 3D Printed | |
| 8 | 2 | DP - Frame Tube - Floor | - None - | Misumi | HFS3-1515-286 |
| 9 | 16 | Hex socket head cap screw M3x0.50 x 10 | Steel Class 8.8 | ||
| 10 | 11 | Hex socket countersunk head screw M3x0.5 x 10 | Stainless Steel | ||
| 11 | 11 | Plain washer large grade A M3 | Stainless Steel | ||
| 12 | 13 | Hex nut grade A & B M3x0.5 | Steel | ||
| 13 | 2 | 15.0 x 24 x 05.0 - 61802-2Z Ball Bearing | Steel 52100 | 61802-2Z | |
| 14 | 1 | "CONN JACK STEREO 1/4""" | - None - | Amphenol Audio | ACJS-MV-3 |
| 15 | 1 | 04.0 x 12 x 04.0 - 604 ZZ Ball Bearing | Steel 52100 | 604 ZZ | |
| 16 | 1 | Shoulder Screw | Steel Class 10.9 | McMaster | 92981A142 |
| 17 | 2 | 6.00 x 10.00 Sleeve Bearing | Bronze (8-14% Sn) | McMaster | 1677K221 |
| 18 | 1 | DP - Base | - None - | Laser cut | |
| 19 | 2 | DP - Heel Shaft | - None - | 3D Printed | |
| 20 | 1 | DP - Bearing Mount | - None - | 3D Printed | |
| 21 | 1 | DP - Board Tube | - None - | Misumi | HFS3-1515-171 |
| 22 | 1 | DP - Strengthener Width | - None - | 3D Printed | |
| 23 | 1 | DP - Feet - Strengthener Length | - None - | 3D Printed | |
| 24 | 1 | DP - Shaft Spacer Long | - None - | 3D Printed | |
| 25 | 4 | DP - Velcro | - None - | McMaster | 9736K63 |
| 26 | 1 | DP - SelfKick Trigger | - None - | 3D Printed | |
| 27 | 1 | DP - SelfKick | - None - | 3D Printed | |
| 28 | 1 | DP - SelfKick Foam | - None - | McMaster | 9349K2 |
| 29 | 1 | DP - Fixed Spring Holder | - None - | 3D Printed | |
| 30 | 10 | Hex socket countersunk head screw M4x0.7 x 20 | Stainless Steel | ||
| 31 | 10 | Prevailing torque nut M4x0.7 | Steel | ||
| 32 | 2 | DP - Beater Rotate | - None - | 3D Printed | |
| 33 | 1 | DP - Shaft - Beater Holder | - None - | 3D Printed | |
| 34 | 1 | DP - Beater | - None - | 3D Printed | |
| 35 | 1 | DP - Shaft Arm | - None - | 3D Printed | |
| 36 | 1 | DP - Beater - Shaft | Aluminum - 6061 | McMaster | 8974K22 |
| 37 | 1 | DP - Shaft Spring Knurl | - None - | 3D Printed | |
| 38 | 1 | DP - Shaft Spring | - None - | 3D Printed | |
| 39 | 1 | DP - Shaft Tube | Aluminum - 6063 | Amazon | A19082100ux1081 |
| 40 | 1 | DP - Spring Adjust Bearing | - None - | 3D Printed | |
| 41 | 1 | DP - Spring Adjust Slider | - None - | 3D Printed | |
| 42 | 1 | DP - Shaft Spacer Short | - None - | 3D Printed | |
| 43 | 3 | Hex socket head cap screw M4x0.70 x 20 | Steel Class 8.8 | ||
| 44 | 1 | Hex socket head cap screw M5x0.80 x 25 | Steel Class 8.8 | ||
| 45 | 1 | Socket Head Cap Screw | Steel Class 10.9 | ||
| 46 | 4 | M4 Thread Insert | Yellow Brass | McMaster | 94459A170 |
| 47 | 1 | DP - Link | - None - | 3D Printed |
Concept details
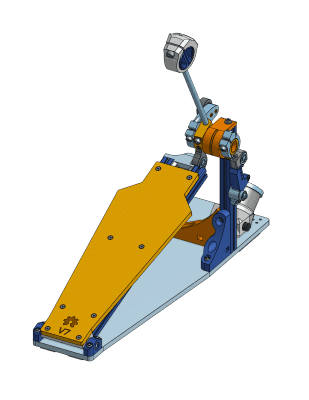
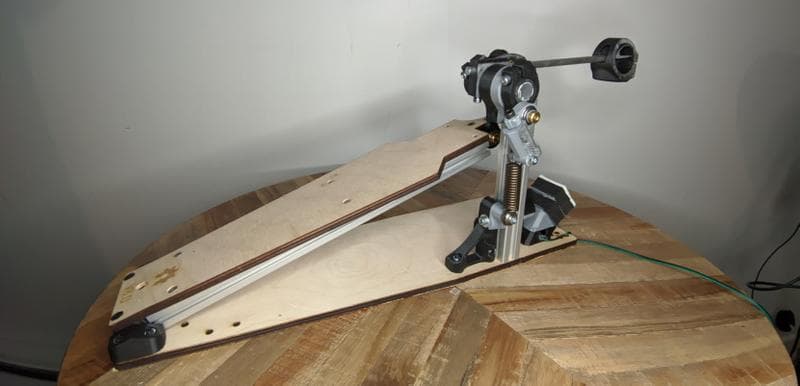
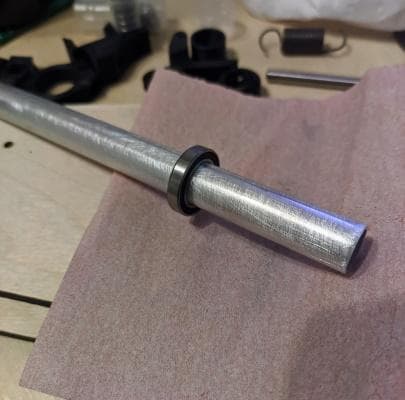
15 mm Aluminum tube main shaft
This is something very unusual for drum pedals, but I gave it a try, and I'm very pleased by the result. I've realized that the 8 mm shoulder screw with the steel flange couplings were getting pretty heavy, and wanted to go the complete opposite way. An aluminum tube will be light, while the larger diameter will allow me to clamp components to it with fewer risks of slipping.
Of course, the 15 mm tube isn't designed to match a bearing tolerance. I had to sand it for maybe 2 minutes, measuring the diameter quite often. The tube was slightly oval, one side measuring ~14.99 mm, and the other one ~15.04 mm.
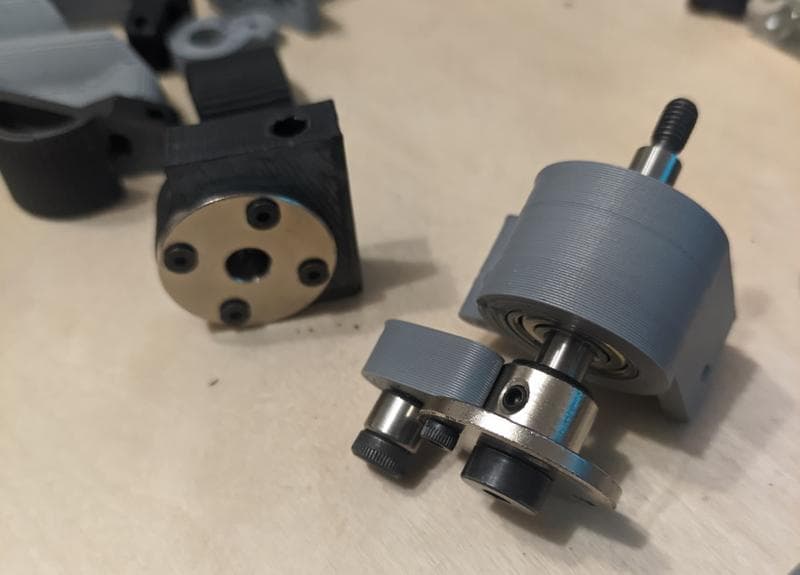
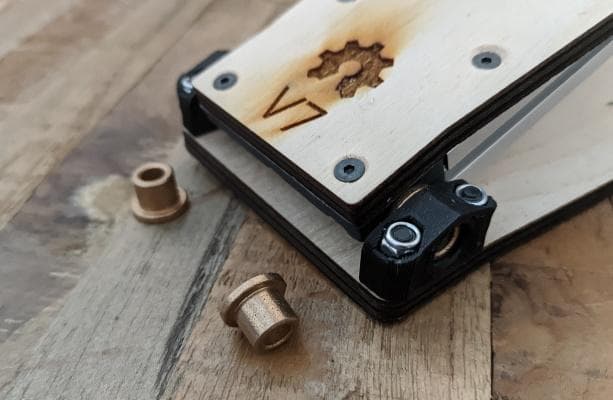
Flange bushings
I decided to opt for flange bushings on the base hinge. I was afraid the fit would be slightly in interference with the dowel pins, as the dowels are slightly oversized.
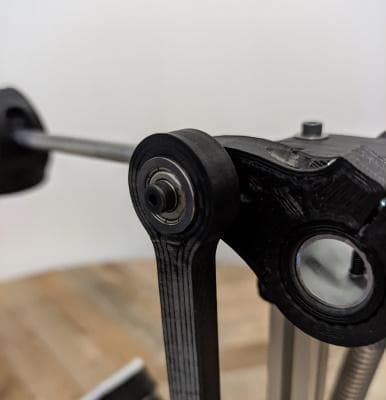
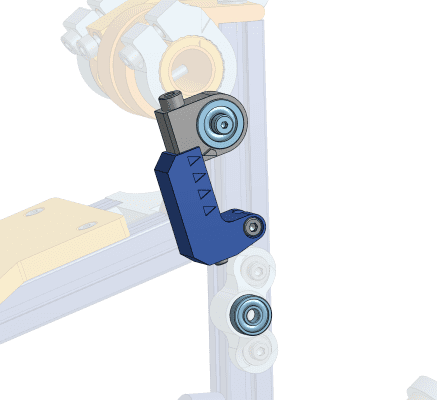
Flange bearings
Similarly, I also changed the needle bearings from the link to a different type of bearing. I decided to opt for two flange bearings rather than a single one because the current footboard isn't as rigid as machined or cast one, and the torsion in the pedal could greatly damage the bearings if only a single one was used.
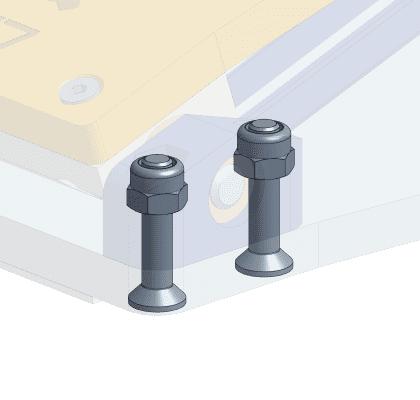
Traditional screw & lock nut for the base components
After many attempts, it seems like this solution is the most reliable. The nuts are kept in place in the 3D printed bushing housing, and the baseplate is holding everything. No more threading, no more cracking.
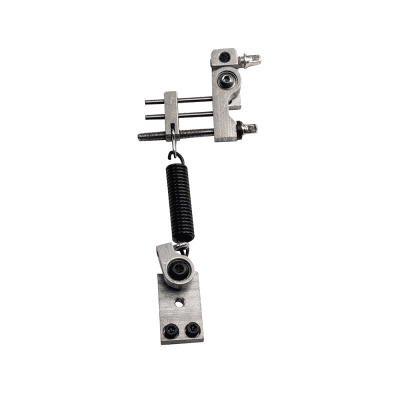
Spring adjust
You can definitely see the resemblance with the Axis solution. My initial solution also had guide rods and bushings, and I ended up simplifying the solution with a very simple solution using coincident faces from two printed parts.
One thing that needs to be fixed is a problem with the screw threads where it tends to grip on the plastic hole. It works fine when tightening the spring, but when I try to loosen, the screw lift itself away from the pivot block (holding the two flange bearing), keeping the same setting despite the adjustment made. A simple hard bushing or sleeve inserted in the pivoting block could easily solve this issue.
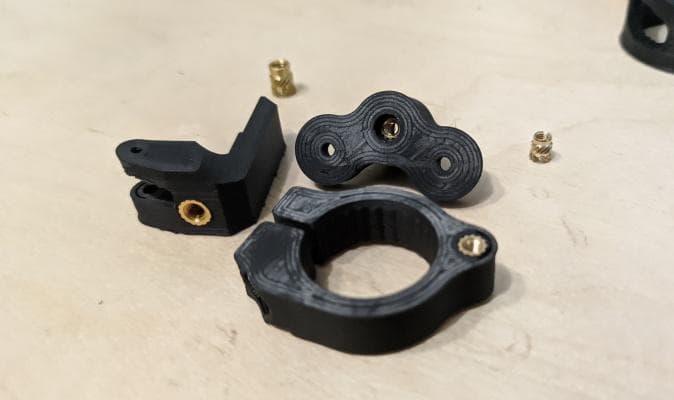
Heat set inserts for important threads
I tried to keep this solution as a last resort, as for some reasons, I wanted to avoid the extra steps and costs of using these brass inserts. I quickly realized that I should have used these much earlier.
There have been a couple of issues that needed improvements regarding tapping threads into plastic. First, it's very hard to gauge the maximum torque that can be applied in a plastic thread. Still today, I still strip one of the M3 threads on the hinge block... Second, since it's hard to gauge the limit, many fastened assemblies will loosen over time and vibration. This is the case for the link
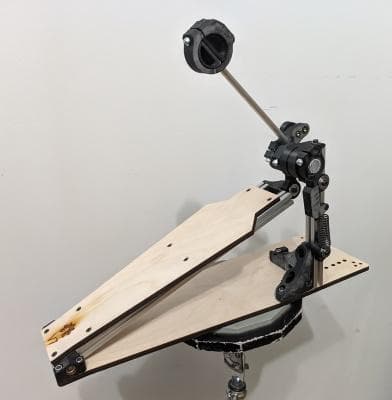
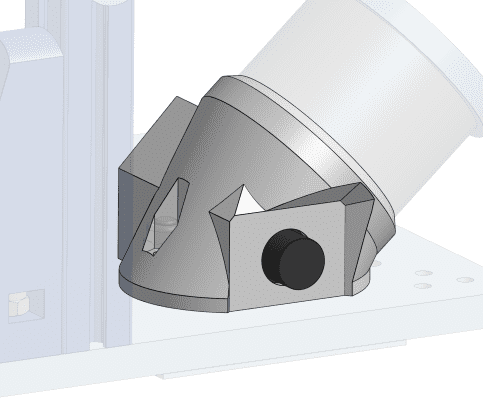
Added 1/4" jack for self-kick
The previous self-kick version have proven to offer a great feel, low volume, and great sensitivity. With this upgrade, a 1/4" jack is fitted internally, allowing easier connection with drum modules.
Detailed list of changes
| From Version | Part / Zone | Description | Done | Stage | Notes |
|---|---|---|---|---|---|
| V7 | Threaded insert for adjustment, switch for M4 | 2021-10-03 | Beater arm splitted when tightening the beater shaft in place | ||
| V7 | Add jack to self-kick | 2021-09-04 | |||
| V7 | Check for needle bearing with less clearance with specialized supplier | Cancelled | Supplier suggested using ball bearings | ||
| V7 | Add velco on CAD for BOM | 2021-08-24 | |||
| V7 | Test best friction for main shaft | Cancelled | Decided to screw a 3d printed sleeve on the tube to avoid any possible slipping. | ||
| V7 | Drill and fix the beater holder on the tube | 2021-08-24 | |||
| V7 | Switch main shaft to 15mm aluminum tube | 2021-08-22 | Replace the 8mm shoulder screw | ||
| V7 | Add Bearing holder for spring top side too | 2021-08-24 | |||
| V7 | Improve self kick printability | 2021-09-04 | Sharp edges didn't look good | ||
| V7 | Add more self kick positions | 2021-09-25 | |||
| V7 | Improve self kick wiring | 2021-09-25 | |||
| V7 | Change Link bearing to flanged | 2021-09-23 | |||
| V7 | Change hinge bearing to bushing with flanges | 2021-09-23 | |||
| V7 | Replace spring clips with U-grooved ball bearing | 2021-09-23 | |||
| V7 | Find way to adjust the spring tension easily | 2021-10-03 | |||
| V7 | Replace threads in plastic for the base | 2021-09-25 | Most parts were splitting due to the weakness in the layer plane | ||
| V7 | Add the version and OSHW logo in the design | 2021-10-03 | |||
| V7 | Increase attack angle | 2021-10-03 | Feel wasn't good when set as on the 3D. Link was quite short when set at optimal angle. Moved from 5° to 20° | ||
| V7.1 | Add threaded insert for beater | 2021-10-23 | |||
| V7.1 | side mounted hex nuts are too loose | 2021-10-23 | Removed 0.20mm each side. Measured 7.60mm on the 3D printed part, CAD was at 7.30mm, not CAD is 6.90mm | ||
| V7.1 | change 2 m3 flat head to m4 on the board | 2021-10-23 | |||
| V7.1 | Clear threaded insert link arm | 2021-10-23 |
Conclusion
Finally, I've reached to a point where I'm very satisfied with the general feel of the pedal. The next steps should be about improving the usability of this pedal. For example, providing a strap version, adding the ability to fold the pedal, design a short board version.
Also, I'd like to start developing a sheet metal version on top of this one. I want to give anyone the opportunity to make one themselves, no matter if they have a workshop or just a simple 3D printer and basic tools (like I do!).